Changing your Remote Desktop port is a foundational security step that starts with a simple tweak to the Windows Registry and a quick update to your firewall rules. The goal is to move your RDP service off the default TCP port 3389—a constant target for automated attacks—to a less predictable port number. This one change can dramatically reduce your system's exposure to opportunistic cyber threats.
Leaving the default Remote Desktop port open is like leaving your front door unlocked with a giant, glowing sign pointing right at it. The standard port, TCP 3389, is universally known, making it the primary target for malicious actors running automated scanning tools. These bots constantly scour the internet, specifically looking for open port 3389 to launch attacks.
This isn't just a theoretical threat; it's a daily reality for millions of systems. When a scanner finds your open port, it immediately flags your network as a potential target for more aggressive tactics. The most common follow-up is a brute-force attack, where automated scripts try thousands of common username and password combinations per minute, hoping one will stick.
The sheer volume of exposed RDP endpoints is staggering. Network scanning tools consistently detect roughly 4.5 million publicly accessible RDP endpoints worldwide, making it one of the most vulnerable protocols on the internet. This widespread exposure is a primary driver for cyberattacks, as botnets are programmed to prioritize port 3389 for attacks like credential stuffing and ransomware deployment. You can learn more about how Microsoft views this default configuration on their official documentation page.
By not changing your remote desktop port, you are essentially leaving your system in this massive, highly visible pool of potential victims. It’s an open invitation for trouble that requires minimal effort from attackers to exploit.
The table below breaks down the specific dangers tied to leaving port 3389 exposed.
| Risk Factor | Description | Impact on Security |
|---|---|---|
| Automated Scans | Malicious bots constantly scan the internet specifically for open port 3389. | High. Your server is instantly identified as a potential RDP target without any effort from an attacker. |
| Brute-Force Attacks | Once discovered, the port is subjected to automated login attempts using common credentials. | High. A weak password can lead to a full system compromise in a matter of hours or even minutes. |
| Ransomware Deployment | Gaining access via RDP is a common entry point for deploying ransomware across a network. | Critical. A successful breach can lead to catastrophic data loss and business disruption. |
| Credential Stuffing | Attackers use lists of stolen credentials from other breaches to try and log in. | High. If any user has reused a password, the attacker gains immediate, legitimate access. |
Leaving the default port open makes your system an easy, low-effort target for a wide range of automated threats.
An open default port is often the first domino to fall in a larger security incident. Once an attacker gains access through a successful brute-force attack, they can move laterally through your network, escalate their privileges, and deploy ransomware. The initial entry point was simply an unlocked, clearly marked door.
A remote desktop port change is a classic example of "security through obscurity." While it's not a complete solution on its own, it effectively removes your system from the low-hanging-fruit category that attackers prey on.
To fully grasp the dangers of an unsecured RDP port, it's important to understand the broader Top 7 Cybersecurity Risks of Remote Work. Understanding what a Remote Desktop Connection is and how it functions is also key to securing it properly; you can explore the fundamentals in our guide on what is Remote Desktop Connection. This simple adjustment is one of the quickest and most effective wins for hardening your server's defenses against a constant barrage of automated threats.
Alright, this is where we get our hands dirty. The actual remote desktop port change happens deep inside the Windows Registry. If you've never poked around in there before, it can feel a little intimidating, but the process is actually quite simple as long as you're careful.
First, a quick but serious word of caution: the registry is essentially the central nervous system of your operating system. Making the wrong change can lead to instability or worse.
Crucial First Step: Always, always back up your Windows Registry before you make a single edit. This creates a restore point you can fall back on if something goes sideways. A good backup turns a potential catastrophe into a minor inconvenience.
With your backup saved, you're ready to get to the core of the task.
This infographic breaks down the typical attack flow that targets the default RDP port, which is exactly what we're trying to prevent.
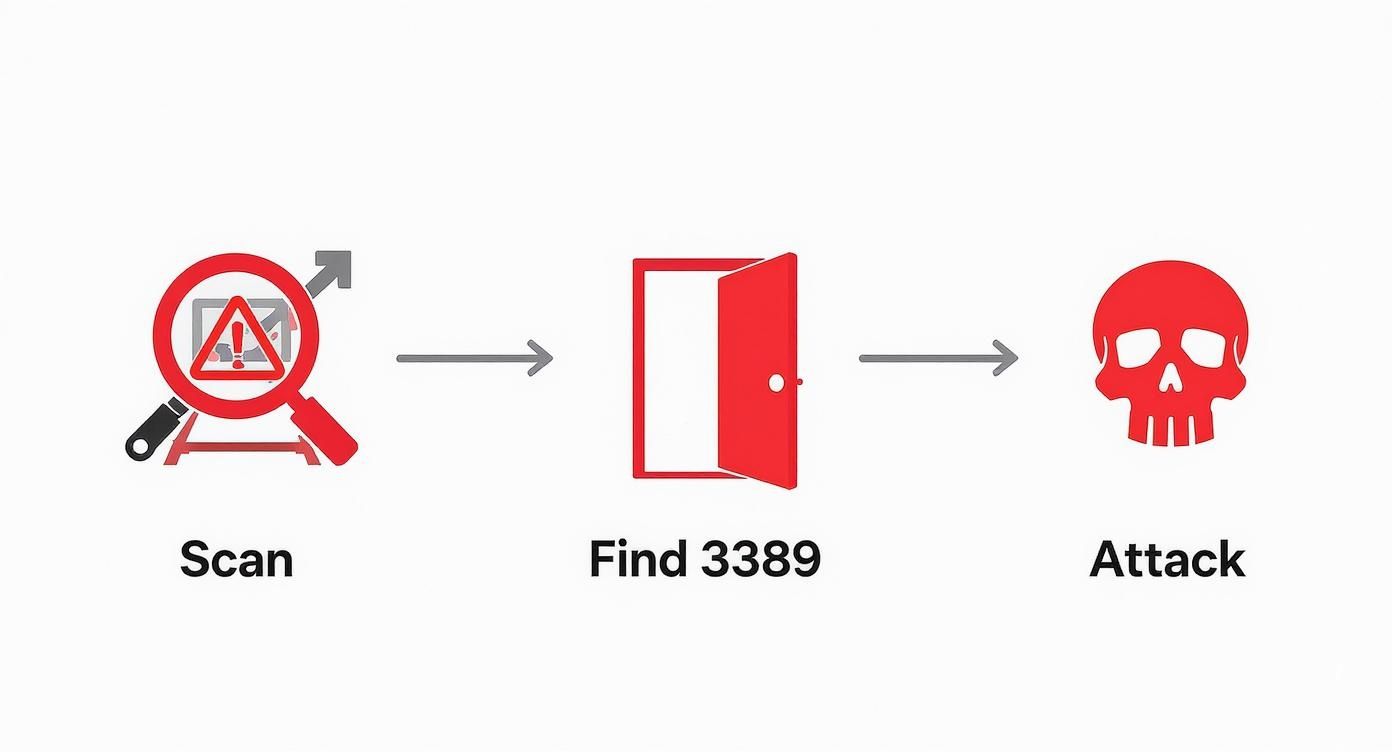
As you can see, automated scanners are constantly hunting for that default port. By changing it, you make your server invisible to a huge chunk of these brute-force attempts.
First things first, you need to open the Registry Editor. The quickest way is to press the Windows Key + R to bring up the Run dialog, type regedit, and hit Enter.
Once the editor is open, you have to get to a very specific key. You could manually click your way through the folders on the left, but there's a much faster way. Just copy and paste the following path directly into the address bar at the top of the Registry Editor window:
HKEY_LOCAL_MACHINE\System\CurrentControlSet\Control\Terminal Server\WinStations\RDP-Tcp
This path is the direct route to the settings that control your RDP connections. Knowing your way around the registry like this is a fundamental skill covered in any good server setup tutorial.
Once you've navigated to that key, you'll see a list of values in the main pane on the right. We're looking for one specific entry.
In that right-hand pane, find the value named PortNumber. This is the key that tells the Remote Desktop service which port to listen on.
Double-click PortNumber to open the "Edit DWORD (32-bit) Value" window.
Now, pay close attention here—this is where a lot of people make a mistake. By default, the value is shown in Hexadecimal. To avoid any confusion or errors, you need to switch the "Base" setting over to Decimal. This lets you type in the new port number just like a regular number.
With Decimal selected, you can now enter your new, custom port number into the "Value data" field.
When you pick a new port, don't just choose something common like 3390. Attackers know to check those, too. The best practice is to select a high, random number from the Dynamic Port Range, which runs from 49152 to 65535.
Here are a few tips to guide your choice:
12345, or anything else that's easy to guess. The goal is obscurity.Let's say you pick a port like 58372. Enter that into the "Value data" box, click "OK" to save it, and you can close the Registry Editor.
Just keep in mind the change isn't live yet. For the new port to become active, you'll either need to restart the "Remote Desktop Services" service or simply reboot the whole computer.
Okay, you’ve just edited the registry to tell Remote Desktop which new door to use. Great first step. But there’s a catch: Windows Firewall, your system’s digital bouncer, still has the old port (3389) on the approved list and has no idea about your new one.
If you stop here, you're going to have a bad time. Every attempt to connect remotely will get shot down because the firewall will simply block it. This is the step where we give the firewall the updated guest list, letting legitimate traffic through while keeping everyone else out. I've seen countless people forget this and waste hours troubleshooting a connection that was never going to work in the first place.
We're going to create a new rule that explicitly allows traffic on your custom port. Then, just as important, we'll shut down the old default rule for good.
First things first, you need to open Windows Defender Firewall with Advanced Security. The quickest way is just to search for it in the Start Menu. Once it's open, you'll see a navigation pane on the left.
Go ahead and click on Inbound Rules. This shows you everything controlling incoming traffic. Over in the "Actions" pane on the far right, click New Rule… to kick off the New Inbound Rule Wizard. This tool will walk us through the setup, screen by screen.
The wizard will ask what type of rule you're creating. Since our whole goal is to open a specific network port, choose the Port option and hit Next.
Now we get down to the details. The wizard needs two pieces of information: the protocol and the port number.
After you've entered the port, click Next. The next screen asks what to do when a connection matches your new rule. We obviously want to let the traffic in, so choose Allow the connection and move on.
Next up, you need to decide which network profiles this rule applies to. You’ll see three choices: Domain, Private, and Public. For most situations, like a standalone server or a workstation, applying the rule to Private and Domain is all you need. If you plan on connecting from a public network (think coffee shop Wi-Fi), you'll need to check Public, but just be mindful of the security implications. Understanding these layers of protection is a huge part of what is network security.
Finally, give your new rule a name that makes sense. Something like "Custom RDP Port (TCP-In 58372)" is perfect. A clear name makes it easy to find later. Click Finish, and your new rule is live.
We're not done yet. Creating the new rule is only half the battle. If you leave the old rule for port 3389 active, you're leaving a well-known security loophole wide open, which defeats the entire purpose of this exercise. We need to close that door.
Back in the list of Inbound Rules, scroll down until you find the rule named Remote Desktop – User Mode (TCP-In).
A quick pro-tip: Don't delete this rule. It's always better to disable default rules than to delete them. This way, you can easily turn it back on if you ever need to revert your changes for troubleshooting.
Right-click the rule and select Disable Rule. You'll see the little green checkmark icon turn into a grey disabled symbol.
And that's it. You’ve successfully closed the old, common entry point and are now forcing all RDP traffic through your new, much less obvious port. Your system is now a significantly harder target for automated scans and attacks.
Alright, you've done the heavy lifting on the server side—the registry has been tweaked, the firewall rules are set, and the RDP service has been restarted. Now for the moment of truth: connecting to the machine using your new custom port.
From a user's perspective, this is the only part of their daily routine that actually changes. Making sure this last step is smooth is key to a successful rollout. The good news? All the hard work is behind you.
To get started, just open the Remote Desktop Connection app. You can find it by searching for mstsc.exe in the Start Menu. In the "Computer" field, where you'd normally enter the PC name or IP address, you'll need to add one extra piece of information.
The format is simple: just add a colon (:) after the computer name or IP, followed by your custom port number.
Your-PC-Name:5837210.0.0.50:58372This tiny addition tells the RDP client to skip the default port 3389 and knock on the new, secret door you just created. If you forget to add the port, the connection will just time out, leaving you wondering what went wrong.
Pro Tip: Don't make your users remember this every time. In the RDP client, click "Show Options," fill in the new connection details, and then on the "General" tab, click "Save As…" This creates a new
.rdpshortcut they can just double-click from their desktop.
Even with a perfect setup, you might hit a snag. In my experience, when an RDP connection fails after a port change, it almost always comes down to two simple culprits: a typo or a firewall.
Before you dive into complex network diagnostics, just double-check these things first:
58732 instead of 58372? Make sure the port in the RDP client is an exact match for what you configured in the registry and the firewall.A solid connection is just one part of the user experience. For teams that need to juggle multiple applications, setting up a remote desktop with two monitors can be a game-changer for productivity. It's a simple client-side setting that makes a huge difference in workflow efficiency.
Successfully changing your remote desktop port is a fantastic security win. You've just made your server invisible to the endless waves of automated bots that do nothing but scan for the default port 3389. It's a huge step forward.
But don't stop there. Think of it as moving your front door to the side of the house; it definitely stops casual wanderers, but a determined intruder will eventually find it. This approach, known as "security through obscurity," is valuable but should only be the first layer in a much stronger, multi-layered defense.
True RDP security comes from assuming an attacker might eventually discover your new port. Now, let’s explore the essential measures that will transform your RDP setup from merely hidden to genuinely hardened.
One of the most powerful tools in your arsenal is Network Level Authentication (NLA). Before NLA existed, an RDP connection would fully load the Windows login screen before asking for credentials. This ate up server resources and gave attackers a direct interface to hammer with brute-force attacks.
NLA completely changes the game.
When enabled, it forces the connecting user to authenticate before a full RDP session is even established. If the credentials are bad, the connection is dropped immediately. Attackers are stopped in their tracks before they can even see the login prompt. Frankly, it’s a non-negotiable security feature that should always be turned on.
The history of RDP security is a good reminder that protocols are always evolving. Early versions relied on weak encryption, like RC4 and 56-bit DES, which made them vulnerable to modern attacks. While today’s RDP supports robust standards like AES-256 and TLS 1.2, many systems are still configured to allow older, weaker ciphers for backward compatibility.
That combination of a well-known default port and weak encryption creates a perfect storm for attackers. This is exactly why security pros recommend not just changing the port but also forcing the use of modern encryption standards.
Always configure your RDP sessions to use the highest level of encryption available. This is crucial for protecting your data in transit.
By combining a custom port with NLA and strong encryption, you create a powerful security trifecta. An attacker must first find the correct port, then pass an authentication challenge, and finally contend with modern encryption—a far more difficult task.
For the highest level of security, nothing beats Multi-Factor Authentication (MFA). Requiring a second form of verification—like a code from an authenticator app—means that even if an attacker manages to steal a user's password, they still can't get in. Implementing MFA on RDP connections effectively neutralizes the threat of compromised credentials.
You should also seriously consider using a Remote Desktop Gateway (RD Gateway). An RD Gateway funnels all RDP traffic through a single, secure point over HTTPS. This means you only need to expose one port (443) to the internet, which dramatically shrinks your attack surface. It acts as a secure proxy, adding another robust layer of protection between your servers and the outside world.
To continue building a comprehensive defense, you can explore our detailed guide on remote access security best practices or check out these further IT security best practices to safeguard your entire infrastructure.
Even with a step-by-step guide, it’s normal for a few questions to pop up when you’re tweaking something as critical as your RDP port. Let's walk through some of the most common ones I hear, so you can make the change with confidence.
This is a classic "gotcha." If you change the RDP port in the registry but forget to update the Windows Firewall, your remote connection will simply fail. Every single time. It's not broken—it's just blocked.
Windows Firewall operates on a "deny by default" principle for anything it doesn't recognize. Without a specific inbound rule telling it to allow traffic on your new, custom port, it’s going to shut the door.
You absolutely must create a new "allow" rule for your custom TCP port. Just as important, go back and disable the old rule for port 3389. Leaving it open is like locking the new front door but leaving the back door wide open.
No, not even close. Think of it as a valuable first step, a bit of "security through obscurity." It’s incredibly effective at hiding your server from the low-hanging fruit—the automated, wide-net scans that are constantly hammering away at the default port 3389.
But a determined attacker with the right tools can still run a port scan and eventually find your new listening port.
A port change isn't a silver bullet; it's just one of many layers in a strong defense. It has to be combined with other security fundamentals to be truly effective.
Real-world security comes from a multi-layered strategy. At a minimum, this should include:
You’ll want to pick a port from the Dynamic or Private Port Range, which runs from 49152 to 65535. This block of high-numbered ports is specifically set aside for custom applications and temporary connections, making it the perfect place for your RDP service.
Stay far away from "well-known" ports (0-1023) and "registered" ports (1024-49151). These are often reserved for common services like web servers, email, or databases. Using one of them is just asking for a conflict down the road.
By picking a high, seemingly random number in the dynamic range, you make it much harder for attackers to guess and avoid clashes with other software running on your system.
Ready to move your business-critical applications to a secure, professionally managed cloud environment? Cloudvara offers dedicated servers with 24/7 support and a 99.5% uptime guarantee, centralizing your software on a platform accessible from anywhere. Start your free 15-day trial at https://cloudvara.com today.