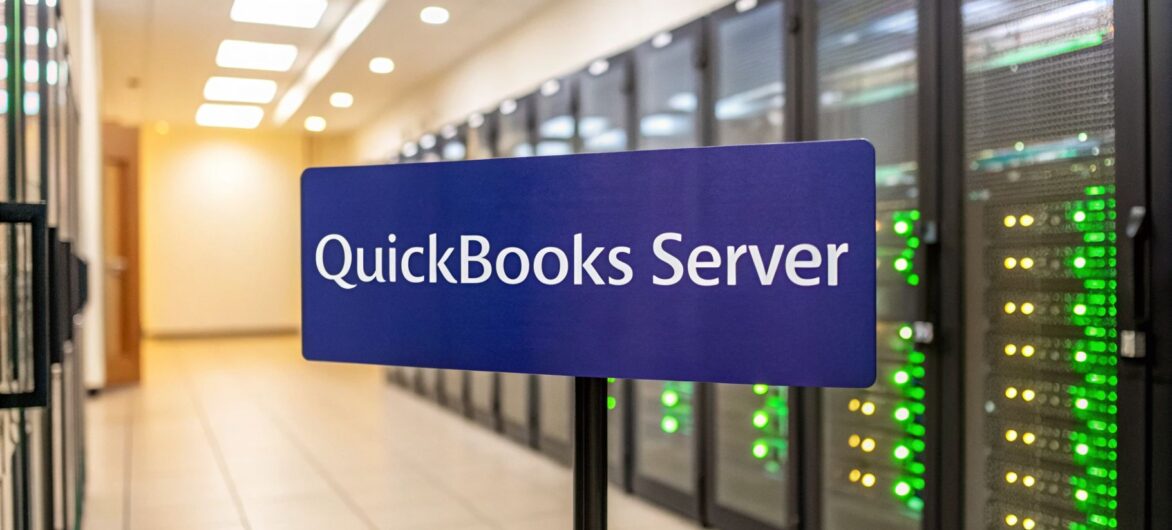
Putting QuickBooks on a server simply means you're shifting from a single-user setup to a centralized system. This move allows multiple team members to access the same company file at the same time, a critical step for any growing business needing collaborative, secure, and remote access to financial data. It's the solution to workflow bottlenecks and scattered data silos.
You’re probably here because your current accounting workflow is hitting a wall. Maybe one person has become the bottleneck for all financial tasks, or you’re getting nervous about your company’s entire financial history living on a single, vulnerable laptop.
This is a common growing pain for businesses and accounting firms when a standalone QuickBooks Desktop installation just can’t keep up anymore.

Imagine it’s tax season. Your firm has three bookkeepers who all need to work in the same client file simultaneously. Without a server, they’re stuck taking turns and passing files back and forth—a slow and error-prone nightmare. A QuickBooks on server setup solves this instantly by enabling multi-user mode the way it was meant to be used.
The need for a server isn't just an IT problem; it's a business growth problem. Think about a construction company where project managers in the field need to check real-time job costing reports. Or a retail business with multiple storefronts that has to sync inventory and sales into one master file.
These scenarios are simply impossible with a standard desktop installation.
A server-based setup directly tackles several key challenges:
By centralizing your QuickBooks data on a server, you transform your accounting from a solitary task into a collaborative, real-time business function. It’s the foundational step toward building a scalable financial infrastructure.
When deciding to run QuickBooks on a server, you have two main paths to consider. Each has very different implications for your budget, security burden, and day-to-day operations. Understanding the trade-offs is the first step toward making a confident decision.
The first option is a physical, on-premise server. This is a machine that you buy, own, and keep in your office. You’re responsible for everything: purchasing the hardware, installing the software, managing security patches, running backups, and fixing it when it breaks. This gives you complete physical control but demands a big upfront investment and ongoing IT expertise.
The second path is a cloud-hosted server. Here, a third-party provider like Cloudvara hosts your QuickBooks software on their secure, high-performance servers in a data center. You access it through a remote desktop connection. This model turns a large capital expense into a predictable monthly operating expense. A detailed comparison of cloud servers vs. in-house hosting can help you weigh the specifics. The provider handles the hardware, security, and uptime, freeing you to focus on your business.
Jumping into a QuickBooks server installation without a solid plan is a recipe for late nights and costly mistakes. This is your pre-flight checklist, filled with the kind of practical advice that prevents you from buying underpowered hardware or the wrong licenses.
Think of it like this: a little prep work now saves you from countless hours of troubleshooting later. Getting this part right is the difference between a smooth-running system and one that grinds your team’s productivity to a halt.
Before you spend a dime on hardware or software, you need to take stock of what you’re already working with. This quick audit will immediately highlight any gaps and guide your purchasing decisions, ensuring every dollar is well spent.
Start by asking these critical questions:
This assessment gives you a clear baseline, helping you avoid both a sluggish, under-provisioned server and an expensive, over-provisioned one.
With your audit in hand, you can start mapping out the specs for your on-premise server. While every business is different, some requirements are non-negotiable for a responsive QuickBooks experience.
For the operating system, you absolutely need Windows Server 2019 or 2022. These modern versions have the security and performance foundation needed to run the QuickBooks Server Manager effectively. Don’t even think about cutting corners with a desktop version of Windows; it simply wasn’t built for the constant demands of multi-user database access.
A classic mistake is skimping on RAM. For a small team of 5-10 users, treat 16GB of RAM as your absolute minimum. For larger company files or more users, 32GB is a much safer bet for a smooth, lag-free experience.
As you plan, it's also smart to think about the physical side of things. Consulting an ultimate computer server rack guide can help you plan for not just the server, but also its housing, cooling, and power needs.
QuickBooks licensing trips up a lot of people, but the rule is actually quite simple: one user, one license. If you have five employees who need to be in the company file simultaneously, you need five QuickBooks Desktop licenses, period.
Here’s how the setup works:
The QuickBooks Database Server Manager is the unsung hero that makes this all work. Think of it as the traffic cop, managing user requests, preventing data conflicts, and ensuring everyone sees the most current information.
Running QuickBooks on a dedicated server has been the go-to strategy for accounting firms and growing businesses for years. By 2026, it's expected that over 80% of QuickBooks Desktop installations in professional services will be hosted on Windows servers. A mid-sized law firm with 20 years of transaction history—often exceeding 500,000 entries—would need at least 16GB RAM and a quad-core processor just to keep QuickBooks from bogging down.
For an even deeper dive into the nitty-gritty, check out our guide on https://cloudvara.com/server-setup-tutorial/.
Alright, you’ve done the planning. Now it’s time to get your hands dirty and bring your QuickBooks server to life. This is where all the prep work pays off, and we’ll walk through the installation and setup without getting bogged down in overly technical jargon.
Our goal is to get your multi-user environment running smoothly right from the start. We'll cover installing QuickBooks on the server, getting the Database Server Manager configured, scanning your company file, and connecting your team’s workstations.
This diagram breaks down the three pillars you need to have in place before you even think about installing the software: solid hardware, the right licenses, and a ready network.

Getting these three areas—hardware, licensing, and networking—squared away first is the key to avoiding headaches down the road.
Your first task is installing the full QuickBooks Desktop application directly onto your server. It's not just for hosting the files; the server needs the complete program to manage the database services that allow multiple users to connect simultaneously.
During the installation wizard, you’ll come to a critical choice. Be sure to select "Custom and Network Options." This path gives you the specific settings needed for a server setup. You'll want to choose the option that says you'll use QuickBooks on this computer and host the company file for network sharing.
Once that’s done, the QuickBooks Database Server Manager is ready to go. Think of it as the air traffic controller for your company’s financial data. It manages who gets access, prevents people from overwriting each other’s work, and keeps the connection stable for everyone. It’s installed automatically with the full QuickBooks program, so there’s no separate step here.
With the software installed, you need to tell the Database Server Manager where your company file lives. This is a common tripwire. You must move your company file (the .QBW file) into a shared folder located on the server itself.
From there, open the QuickBooks Database Server Manager and find the "Scan Folders" tab. Add the folder containing your company file and hit scan. This simple action registers the file and officially puts it on the network for your team to access.
Now for a non-negotiable step: setting folder permissions. The folder where your company file resides needs specific permissions for QuickBooks services to read, write, and manage the file correctly.
Here's a crucial tip that gets missed all the time: configure your server's firewall. You have to add exceptions for the specific ports that QuickBooks uses to communicate. If you don't, the firewall will block connections from workstations, leading to errors that are incredibly frustrating to diagnose.
We've seen it time and again—performance issues are often tied to server specs. Diagnostic data shows that company files over 500MB can cause 50-80% slowdowns on underpowered servers. In fact, 40% of firms have reported multi-user lockups during month-end reconciliations. It's a common story; research indicates 68% of businesses migrating from other accounting software hit server-related hurdles. You can find more on historical QuickBooks usage data on Intuit.com.
With the server configured and humming along, it’s time to connect your users. On each workstation, you'll install QuickBooks Desktop, again using the "Custom and Network Options." This time, however, you'll select the option stating that you will NOT be hosting the file on this machine.
After the installation is complete, launch QuickBooks on the workstation. Instead of creating a new company file, choose "Open or restore an existing company." Simply navigate across the network to the shared folder on the server, select your company file, and open it. QuickBooks will automatically recognize the shared setup and switch into multi-user mode.
For a deeper dive into how this mode works, check out our guide on QuickBooks multi-user mode.
Your financial data is the lifeblood of your business, and leaving its security to chance just isn't an option. Protecting your QuickBooks server isn't about a single fix; it's about building layers of defense. This isn't just a firewall conversation—it's a practical playbook for locking down everything from user access to your backup and recovery plan.
A single weak spot can put sensitive information at risk, so a complete security strategy is essential.

Your first and most powerful line of defense is right inside QuickBooks. It all comes down to the principle of least privilege: give people access only to what they need to do their jobs, and nothing more. Someone who only processes accounts payable has no business seeing payroll records.
QuickBooks Enterprise, in particular, gives you incredible control with its detailed, role-based permissions. You can get as specific as locking down individual reports or bank accounts.
This isn't just about preventing fraud; it's a fantastic way to stop accidental data entry errors before they happen.
When your team needs to get into the QuickBooks server from outside the office, that connection becomes a prime target. Simply opening up Remote Desktop Protocol (RDP) to the internet is a huge security hole that invites automated attacks. Don't do it.
A much safer path is using a VPN (Virtual Private Network) or an RDP Gateway. A VPN creates a secure, encrypted tunnel from the user’s computer straight to your office network. An RDP Gateway, on the other hand, acts as a hardened checkpoint, forcing users to authenticate before they can even try connecting to the server.
Two-Factor Authentication (2FA) is non-negotiable for remote access. Requiring a second piece of proof—like a code from a phone app—makes a stolen password almost useless to an attacker.
To keep your financial data available and intact, having reliable remote IT support is crucial for your server setup. When you can't be there in person, you need experts who can securely access and manage the server to fix any issues that pop up.
If you run your own QuickBooks server in-house, the security buck stops with you. You're on the hook for everything: configuring the firewall, applying security patches, and watching for intruders.
That’s a world away from using a dedicated cloud hosting provider like Cloudvara. With a hosted solution, you get enterprise-grade security baked into the service. The provider manages the tough stuff, including:
This approach offloads a massive amount of technical work and gives you a level of protection that’s incredibly expensive and difficult for most small businesses to build on their own. You can dive deeper into key small business cloud security practices to see how they stack up.
A server crash, a ransomware attack, or even a simple power surge could destroy years of financial records in a blink. A rock-solid backup strategy is your ultimate safety net. The 3-2-1 rule is the gold standard for a reason:
For a QuickBooks server, that means having automated, daily backups that are saved both locally and to a secure off-site location, like the cloud. This ensures you can get back up and running quickly and completely, which is priceless peace of mind.
If you're spending more time troubleshooting your QuickBooks on server setup than running your business, you've hit a common and frustrating ceiling. The constant cycle of updates, backups, and hardware worries can feel like a full-time IT job you never signed up for. At this point, many business owners realize their on-premise server is no longer an asset but a bottleneck.
Moving to a dedicated hosted solution is more of a strategic shift than a simple technical upgrade. It's about offloading the entire IT burden—from hardware failures to security threats and remote access headaches—to a team of experts who live and breathe this stuff 24/7.
The decision between an in-house server and a hosted cloud solution really boils down to two things: total cost of ownership (TCO) and operational efficiency. A physical server demands a big upfront investment in hardware, not to mention the ongoing costs for power, cooling, maintenance, and the eventual replacement cycle.
A hosted model flips the script. It turns that large capital expense into a predictable monthly operating expense. But you aren't just renting a server; you're getting a fully managed service that bundles enterprise-grade security, automated backups, and expert support into one package. This frees up both your cash flow and your time.
The real value isn't just in the hardware. It's in the guaranteed uptime during your busiest seasons, the peace of mind from knowing your data is secure, and the ability for your team to work from anywhere without a hitch.
To make a clear-headed decision, it helps to see a direct, side-by-side comparison of what each model truly involves. The differences go far beyond just where the server sits physically; they impact your budget, security, and daily operations.
This table breaks down the key factors so you can see the practical trade-offs.
| Feature | On-Premise Server | Cloudvara Hosted Server |
|---|---|---|
| Upfront Cost | High (hardware, software, setup labor) | None (monthly subscription) |
| Maintenance | Your responsibility (patches, updates, repairs) | Fully managed by the provider |
| Security | Your responsibility (firewalls, 2FA, monitoring) | Enterprise-grade security included |
| Remote Access | Complex setup required (VPN, RDP Gateway) | Built-in, secure, and ready to use |
| Uptime | Dependent on your hardware and power | Guaranteed 99.5% uptime SLA |
| Support | Relies on in-house or contracted IT | 24/7/365 expert support included |
| Scalability | Limited by physical hardware | Easily scalable on demand |
The shift away from self-managed QuickBooks on server setups is backed by some hard numbers. A 2025 Intuit report found that 72% of QuickBooks Desktop users on physical servers had at least one major outage a year, costing an average of $8,500 in lost productivity. In-house servers also hit a wall with scalability—a standard server that can handle 30 concurrent users can cost $5,000-$10,000 upfront. Cloudvara’s platform avoids these issues with commercial-grade servers and built-in two-factor security, helping clients achieve 75% faster year-end closes and cut IT spending by up to 50%. You can dig into more insights from Intuit's findings on their site.
One of the biggest worries about moving to the cloud is the migration itself. Will there be downtime? Is my data safe? The good news is that with a good provider, it’s a well-oiled process handled entirely by their technical team to keep disruption near zero.
Your part in the migration is surprisingly straightforward. It usually looks something like this:
Bring Your Own License: First off, you use your existing QuickBooks Desktop licenses. There’s no need to buy the software all over again.
Provide Your Company File: You’ll simply provide a secure backup of your QuickBooks company file (the .QBB file) to the hosting provider.
The Experts Take Over: From there, the provider’s team handles everything. They set up your private cloud server, install the correct version of QuickBooks, and restore your company file. They make sure every bit of your data, history, and settings are preserved perfectly.
Log In and Get Back to Work: Your team gets new, secure login credentials. They log in and see the same QuickBooks environment they’re used to, but now it’s faster, more secure, and accessible from anywhere.
The entire switch is managed to ensure zero data loss and minimal downtime. For businesses that want this kind of white-glove service, you can explore the specifics of Cloudvara's QuickBooks cloud hosting. It’s designed to give you all the benefits of the cloud without the headaches of a complicated IT project.
Thinking about moving QuickBooks to a server? It’s a smart move, but it naturally comes with a few questions. We get it. Shifting your financial hub can feel like a big step.
Let's clear the air on the most common things people ask when they're considering a server-based setup. Here are the straight answers from our experience helping hundreds of firms make the switch.
Yes, absolutely. This is one of the most common worries we hear, and the answer is simple. Your existing QuickBooks Desktop Pro, Premier, or Enterprise licenses work perfectly in a server environment.
The rule is the same as it is on a local network: each person who needs to access the company file simultaneously must have their own valid license. You just bring your licenses with you when you move to a hosted server. No need to repurchase anything.
This is a critical distinction, and it’s where a lot of confusion comes from. QuickBooks Online is a completely separate product built by Intuit. It has a different interface, different features, and different limitations.
Hosting QuickBooks Desktop, on the other hand, means you’re using the exact same powerful software you use today—just accessed over the internet. You keep all the advanced inventory, reporting, and industry-specific features your team relies on. You just gain the freedom to access it from anywhere.
A hosted server setup means you don't have to sacrifice functionality for flexibility. You keep the powerful desktop software your team is trained on and simply make it accessible from any device, anywhere.
With the right hosting partner, the process is surprisingly hands-off for you. The provider's migration team should handle all the technical heavy lifting.
You’ll typically just need to provide a secure backup of your QuickBooks company file (the .QBB file). From there, their experts build out your dedicated cloud server, install the right version of QuickBooks, and restore your data. They make sure every transaction, report, and setting transfers over perfectly. Your team just gets new login details and can jump right back in where they left off.
Yes, and this is a huge benefit of using a dedicated hosted server. Unlike a closed system like QuickBooks Online, a private cloud environment lets you install the other essential applications your business runs on.
This means your critical third-party tools—like tax software, inventory managers, payment plugins, or even just Microsoft Excel for custom reports—can all run in the same virtual space. It creates a single, unified workspace where all your programs talk to each other seamlessly.
Ready to stop worrying about server maintenance and security? Cloudvara offers a seamless, fully managed cloud hosting solution for QuickBooks and all your business applications. Test our platform with a free, no-obligation trial and see how easy it is to get your team working from anywhere, securely. Start your 15-day free trial today.