For professionals who live on their Macs but work in a Windows world, connecting the two used to be a clunky, frustrating process. Today, it’s a non-issue. The best way to link your Mac to a remote Windows environment is with the official Microsoft Remote Desktop app, available right in the Mac App Store. This tool creates a secure, stable bridge, letting you run essential Windows-only software as if it were native to your Mac.
If you're an accountant, lawyer, or engineer, you know that some industry-standard applications just don't have a Mac version. Accessing them isn't a "nice-to-have"—it's a daily requirement. Being able to connect your Mac to a remote Windows session dissolves that operating system barrier completely. It effectively turns your MacBook or iMac into a single, powerful workstation without needing a second physical machine.
This setup is more than just convenient; it’s a strategic advantage for any business.
This move toward remote access isn't just a trend; the numbers back it up. The global remote desktop software market was valued at $3.33 billion in 2024 and is expected to hit nearly $12 billion by 2032, largely because of the demands of modern hybrid work. This explosive growth shows just how critical a reliable remote access strategy has become for businesses of all sizes.
A seamless remote desktop connection transforms your Mac from a standalone device into a secure portal to your entire business ecosystem. It’s the key to maintaining productivity without compromising on the hardware you love to use.
For companies looking to build out these capabilities, exploring comprehensive Microsoft remote working solutions can offer a bigger picture of why this is so indispensable. And if you're just getting started with the concept, our guide explaining what is remote desktop connection is a great place to begin.
To connect your Mac to a remote Windows machine, you first need the right tool. Your starting point is the Mac App Store, where you’ll find the official Microsoft Remote Desktop app. It might be tempting to grab a download from a third-party site, but stick with the App Store. The official version is vetted by Apple and gets regular security and performance updates straight from Microsoft.
Think of it this way: using the official app is like getting your car serviced at a certified dealer instead of a random garage. You know you’re getting the latest security patches and feature improvements, which is your first and most important line of defense for protecting sensitive business data.
This screenshot shows the official application listing in the Mac App Store. The high user ratings and frequent updates are good signs that you’re getting a well-maintained and reliable tool. This is the only place you should download it from.
Once you’ve installed and launched the app, you’ll be greeted by a clean, simple interface. It’ll be empty at first, since your main task is to add the computer you want to connect to. The app gives you two ways to do this, and knowing which one to pick is key for a hassle-free setup.
You'll see two main buttons: "Add PC" and "Add Workspace." The right choice depends entirely on how your remote system is set up.
For most people connecting to a single, dedicated machine, "Add PC" is the way to go. If you're using a comprehensive hosted solution, "Add Workspace" streamlines everything for you.
Here’s a simple way to think about it. "Add PC" is like plugging a single address into your GPS—it gets you to one specific destination. "Add Workspace," on the other hand, is like getting a pre-planned itinerary from a travel agent with all your important stops already mapped out and ready to go.
Choosing the right connection type from the start saves a lot of headaches later. If your provider gave you a subscription URL, use "Add Workspace." If they just gave you a computer name and login details, use "Add PC."
Getting this right from the start is fundamental. While there are plenty of remote access tools out there, sticking with the official Microsoft client is almost always the most reliable and secure path. To see how it stacks up against other options, check out our guide on the best remote desktop software available today.
With the Microsoft Remote Desktop app installed, you’re ready for the important part: adding your Windows PC to make the connection. When you click "Add PC," you'll see a new window with a few fields to fill out. Getting these details right is the key to a smooth connection, so let's walk through exactly what you need to enter.
This is where the magic happens.
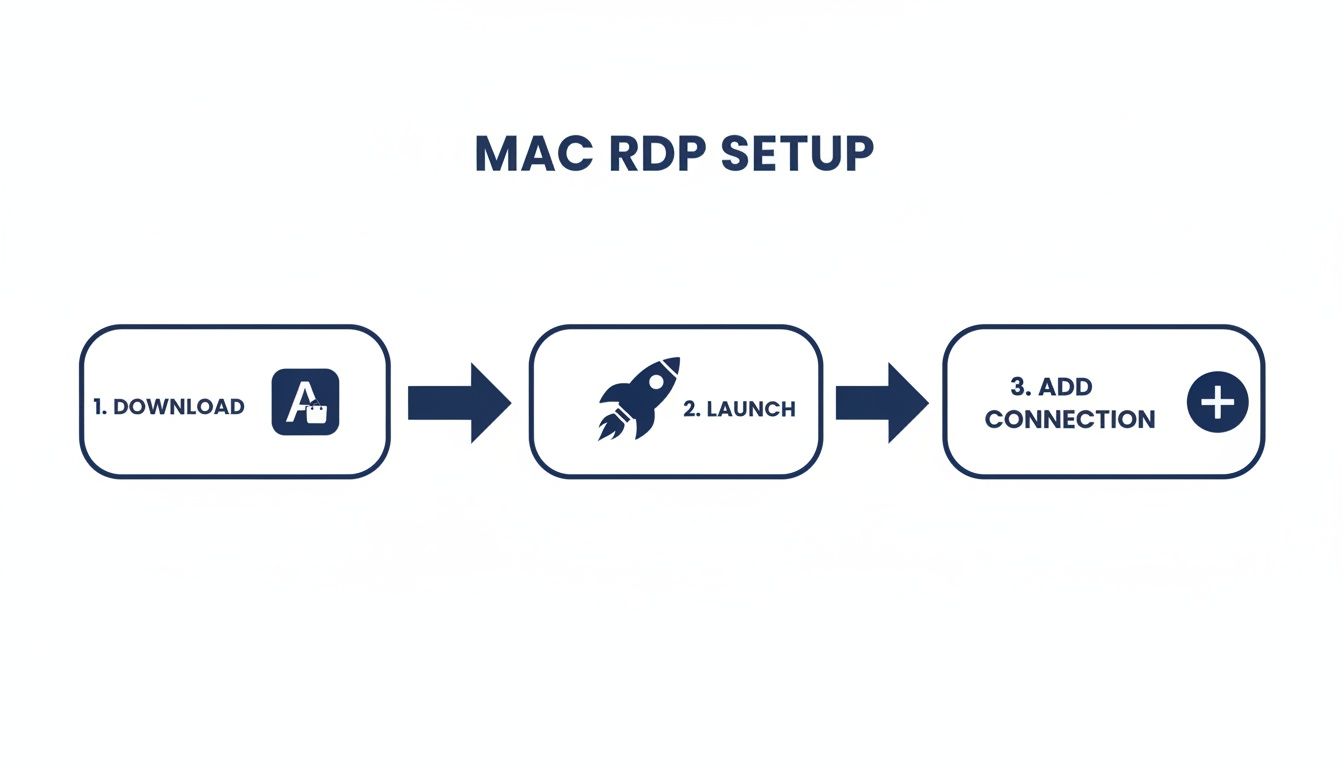
As you can see, the initial setup is straightforward—just a few clicks to download the app, launch it, and add your connection. It’s designed to be accessible for anyone.
The first and most critical field is PC name. This tells the app where it needs to go. Depending on your specific setup, you'll enter one of three things here:
MARKETING-DESK-04.yourfirm.cloudvara.com). This is the most common scenario for business users.Next up is the User account. You can either have the app prompt you for your password every single time or save your credentials for faster access.
When you add a user account, you’ll likely need to include a domain, especially if you're in a corporate or hosted environment. The format is usually DOMAIN\username. For example, if your domain is "Cloudvara" and your username is "jdoe," you’d type in Cloudvara\jdoe. Pay close attention to this formatting—a simple typo here is a frequent cause of login failures.
I've found that getting the PC name and user account details correct is 90% of the battle. If your connection ever fails, the very first thing to do is double-check these two fields for typos.
To help you get everything right on the first try, here’s a quick rundown of what those main fields mean.
| Setting Field | What It Means | Example for Cloudvara User |
|---|---|---|
| PC name | The address of the remote computer. | yourcompany.cloudvara.com |
| User account | Your login credentials for the remote system. | Cloudvara\jsmith |
| Friendly name | A nickname for the connection (optional). | My Work Desktop |
| Gateway | A server that provides secure external access. | (Usually "No gateway configured" unless specified) |
Once these core details are in, you’ve built the foundation for your connection. Now you can fine-tune the experience.
A great remote session is about more than just logging in. The other tabs in the "Add PC" window—Display, Devices & Audio, and Folders—are where you can dial in the settings to make the remote desktop feel like it’s running natively on your Mac.
This is where you control how the remote desktop appears on your screen. You can set it to launch in full screen, dynamically adjust the resolution as you resize the window, and even optimize the feed for high-DPI Retina displays.
For power users, this is also where you configure multiple monitors. If you have a dual-screen setup, you can extend the Windows desktop across both displays, which is an absolute game-changer for productivity. You can learn more about perfecting this in our guide on using a remote desktop with two monitors.
This section lets you decide which of your local Mac resources are shared with the remote Windows session. You can redirect:
You also get to choose where audio plays—on the remote PC (which you can't hear) or right on your Mac. For most people, playing sound on the Mac is the way to go.
Folder redirection might be one of the most powerful features available. By checking Redirect folders, you can pick a folder on your Mac—like your local "Documents" folder or a specific project folder—and make it appear as a drive in the Windows File Explorer.
This creates a seamless and secure bridge for moving files back and forth. You can edit a report saved on your Mac using a Windows-only program, all without having to email files to yourself or use a third-party transfer service. This feature alone makes the process to connect remote desktop from Mac indispensable for professionals in fields like accounting and law.
It’s this kind of secure, device-agnostic access that’s driving the entire remote desktop software market, which was valued at $3.2 billion in 2023 and is projected to hit $9.31 billion by 2032.
For any professional handling sensitive client information, a secure connection isn't just a feature—it's a non-negotiable part of the job. When you connect remote desktop from Mac, you’re opening a direct line into your business's most critical data. It's on you to make sure that line is protected.

Think of it this way: an unsecured remote session is like leaving your office front door wide open overnight. Thankfully, locking it down is straightforward and incredibly effective. These aren't just tips for the IT department; they're essential habits for every single user.
The most powerful layer of security you can add is Two-Factor Authentication (2FA). This one step can stop the vast majority of unauthorized access attempts cold. Even if a thief manages to get your password, they can't log in without that second piece of proof, which is usually a quick code from an app on your phone.
Security is an ongoing process, not a one-time setup. Implementing layers like 2FA and strong passwords creates a formidable defense that protects your clients, your business, and your professional integrity from a wide range of cyber threats.
Beyond 2FA, a few other simple practices will dramatically harden your remote connection. These aren't complex technical hurdles, just smart, effective habits to build.
Putting these measures in place is absolutely crucial for protecting your data. To get a better sense of how it all works together, you can learn more about remote desktop two-factor authentication and see how it fits into a secure, modern workflow.
Let's use a real-world example. Imagine an accountant accessing sensitive tax documents from home. A strong password is the first lock on the door. NLA is the security guard at the front desk, checking credentials before anyone can even get near the office. And finally, 2FA is the unique keycard swipe required to actually enter, proving the user is who they claim to be.
Each layer builds on the others to create a secure environment where your critical data stays protected. Adopting these practices isn’t just good IT hygiene—it’s a core part of being a professional in today's world.
Even with a perfect setup, you'll eventually run into a connection that just refuses to cooperate. Hitting a roadblock when you try to connect remote desktop from Mac is always frustrating, especially when you’re up against a deadline. The good news is that most of these issues boil down to a handful of common culprits that are surprisingly easy to fix.
The most frequent offender is that vague "Cannot connect to the remote computer" error. Before you start diving into complex network settings, it pays to run through a quick mental checklist. It’s almost always the simplest things that get overlooked in a rush.
Start with the absolute basics. Did you mistype the hostname? Even one wrong character will bring the whole process to a halt. The same goes for your username and password—double-check that you've got the domain format right (e.g., DOMAIN\username).
If you’re certain your login details are correct, the next logical step is to figure out what might be blocking the connection. Nine times out of ten, a firewall on your Mac or the remote Windows machine is the obstacle. It might be configured to block the specific port that the Remote Desktop Protocol (RDP) relies on to communicate.
Here’s a simple troubleshooting flow I use:
A methodical approach to troubleshooting will save you a world of frustration. Instead of guessing, just work your way through the potential issues logically, starting with the easy stuff. This process will almost always lead you straight to the solution.
The need for clear troubleshooting guides has exploded with the rise of remote work. The Virtual Desktop Infrastructure (VDI) market, which powers this kind of remote access, was valued at $15.61 billion in 2024 and is expected to hit a staggering $78.03 billion by 2032. As more professionals connect from Macs, knowing how to fix these small hitches has become a core skill.
Sometimes the connection itself works, but the user experience feels… off. Maybe the screen resolution is wrong, making everything blurry or icons weirdly oversized. This is usually a quick fix inside the connection’s display settings.
Just edit your saved PC connection and head over to the "Display" tab. From there, you can uncheck "Optimize for Retina displays" or set a specific resolution that matches your monitor perfectly.
Another common headache is when your local printer or a shared folder doesn't show up in the remote session. This almost always points back to your redirection settings. Go to the "Devices & Audio" and "Folders" tabs for that connection and make sure the right boxes are checked.
A solid understanding of broader IT maintenance practices, both preventive and corrective, can give you the context to stop these issues before they even start. And for more complex network setups, our guide can walk you through how to handle a remote desktop port change.
Even with the best guide, you'll probably run into a few specific questions when connecting your Mac to a remote Windows machine. It's totally normal. Here are some quick, straightforward answers to the things professionals ask us most often.
Yes, absolutely. The Microsoft Remote Desktop app is built for multitasking. You can save the settings for every remote PC or server you need to access and switch between them with a click.
This is a huge time-saver for anyone who needs to jump between, say, a client’s server, their main office desktop, and a cloud-hosted app all in the same afternoon. Each session opens in its own window, letting you create a powerful, multi-screen command center right on your Mac.
Hands down, the most secure and seamless method is folder redirection. Don't bother with clunky emails or third-party cloud drives. When you're first setting up your connection, just head to the "Folders" tab and select the local Mac folder you want to access remotely.
Once you’re connected, that Mac folder magically appears as a new drive inside the Windows File Explorer. From there, it’s just simple drag-and-drop. You can move files between your Mac and the remote session as if they were on the same computer.
Connecting from an unsecured public network—like at a coffee shop or airport—is always a bit risky. While the Remote Desktop Protocol (RDP) itself is encrypted, the network you're on is wide open, which means a determined attacker could potentially spy on your traffic.
To lock things down, always connect to a trusted Virtual Private Network (VPN) before you start your remote session. A VPN wraps all your internet activity in a secure, encrypted tunnel, shielding your login credentials and session data from anyone snooping on the network.
For the ultimate security, you should pair a VPN with Two-Factor Authentication (2FA). This layered approach is the gold standard for protecting against unauthorized access and gives you real peace of mind when you're working on the go.
Ready to centralize your essential business applications on a secure, reliable cloud platform? Cloudvara offers a seamless remote desktop experience with 24/7 support and a 99.5% uptime guarantee. Start your free 15-day trial today and discover a better way to work.